Tuesday, November 25, 2014

Thanksgiving Sonoma Style

I'm planning a Sonoma County-sourced Thanksgiving.  Fresh, free-range turkey, local potatoes and veggies.  My heirloom Halloween decorations have already been baked and are waiting in the freezer to become delicious Thanksgiving pies.

Rose hips, persimmons, pumpkins and pomegranates from the garden will make a beautiful centerpiece.

Saturday, November 15, 2014

Is it a Soup or a Stew?

Hearty soups and stews are on the menu this time of year.  It always seems that when the first of the cold weather shows, our bodies crave the warmth of thick, warming and brothy dishes.

So put on a sweater and slurp up some soup.  This minestrone will keep you toasty. This is no soup for light-weights.  Big chunks of meat, mushrooms and pasta make this almost a stew.

(By the way, I found the grass-fed Chuck at my local Safeway supermarket.  Kudos to Safeway for stocking more and more grass-fed meats, chicken and eggs.  And kudos to all of you out there who vote with your wallets, making it possible for stores like Safeway to stock their meat departments with high-quality health-promoting product.)


Minestrone with Grass-Fed Chuck Roast

This soup is a meal all on its own.  Serve it alone, or add a green salad on the side if you wish.

The grass-fed chuck I used was tender and delicious.  Be sure not to overcook the meat and do not let the soup come to a boil once the meat has been added.

1 1/2 lb grass fed Chuck cut into bit-sized pieces and gristle cut away (I found the grass-fed chuck at my local Safeway)
3 T olive oil
1 onion chopped medium-fine
2 c celery chopped medium-fine
1 large carrot chopped medium-fine
1 clove of garlic minced
1/3 c red wine
1 15 oz can diced tomatoes
32 oz organic beef broth
1 15 oz can cannellini beans drained and rinsed thoroughly
6 oz mushrooms sliced
5-6 oz quinoa pasta rotelle shaped
2 c water
Generous fresh ground Himalayan pink sea salt and black pepper to taste
1 t oregano dried
1/2 t basil dried
Fresh basil leaves
Optional:  Parmesan Cheese

Add the olive oil to a large soup pot and raise heat to medium-high.  When oil is heated, add half the meat to the pot and brown and sear stirring for several minutes.  Remove meat to a bowl while there is still some pink showing through.  Do not overcook.  Brown and sear the remaining meat.  Remove and let sit.

Add the onion, celery, carrot and garlic to the pan and cook until vegetables are turning soft.  Add the 1/3 cup wine.  Add the tomatoes and beef broth and bring to a boil.  Lower heat to medium and cook for 10 minutes with lid on.

Remove lid and add in the cannellini, mushrooms, spices and quinoa pasta.  If the liquid seems to have cooked down and there is not enough broth, add the 2 cups of water.  Cook about 8 minutes.  Add the beef.  Serve with chopped basil on top.

This soup is perfectly delicious without any cheese, so don't feel like you're missing anything if you are avoiding dairy.  If you're not, go ahead and sprinkle fresh grated Parmesan cheese into each bowl.  

Thursday, November 13, 2014

And More Squash!


We're still eating squash...and loving it.  In fact, right now, with the leaves still golden, coral and salmon outside, we're in the mood for foods in those very same gorgeous warm and rosy colors.  Autumn season is short and sweet, why not celebrate it in every way possible?  


Gorgeous Autumn Colors!


Butternut Salmon Thai Curry

This is a truly delicious dish.  Serve it with rice and you've got a meal.  We're loving the Tru Roots sprouted brown rice these days.  It has a great texture and the sprouting makes it more alkaline and easier to digest.  Yes!  Healthy, plus delicious, is our favorite combination.

2 cups canned coconut milk
2 T red Thai curry
3 c chicken broth
6 T fish sauce
4 lemon grass stalks cut into thirds and smashed with the flat blade of a knife
grated peel from 2 tangerines  (great for healing skin conditions)
1 t turmeric
3-4 cups cubed butternut squash (about 1 lb)
2 cans organic garbanzo beans (rinsed thoroughly to aid digestion)
1 lb salmon filet cut into bite-sized pieces*  
6 oz shiitake mushrooms stems removed and sliced
bok choy leaves (2 generous handfuls) roughly chopped into large pieces
chopped cilantro for garnish

Put the coconut milk and curry in a stock pot and whisk together over medium high heat.  Add the broth, fish sauce, lemon grass, turmeric, and squash and cook ten minutes.  Add the garbanzo beans and cook another ten minutes watching the squash until it is about 5 minutes away from being cooked. Add the salmon* and mushrooms and cook another few minutes until the salmon just barely cooked. Add the bok choy leaves. Serve in bowls with rice and sprinkle cilantro over the top. 

*If you find it difficult to remove the skin from the salmon, place the whole filet in the soup pot skin side down for about 60 seconds.  Pull the filet out and the skin should peel off easily. Chop the filet and add back to the pot to continue cooking.   


  Pumpkin or Squash Tart

2 cups baked pumpkin or butternut squash cubes
1 grated baked potato
1 sweet onion sliced and carmelized
3 scallions, sliced thinly
Salt
Pepper
For pumpkin add 2 T coconut nectar
3 eggs, beaten

With a fork, slightly mash together all of the ingredients except the eggs.  Stir in the eggs just enough to coat the other ingredients.  Spoon into the center of einkorn pastry circles (see here for recipe).  Fold up all of the edges 1/3 of the way to the center and press onto filling.  Bake at 350 degrees for 30 minutes or until filling is just firm to the touch and crust is golden brown.


A few other really great squash recipes:


Pumpkin Stuffed With Everything Good


Sugar Free Low Gluten Pumpkin Pie--It's Yummy!

And for the best pumpkin soup ever (of course, you have to make the ham to get the ham stock), but this recipe is spectacular--my family begs for it!  It's from one of Chef Gordon Ramsay's Christmas specials.  I've attached the video below, but I've also pasted in the actual recipes for your convenience.  Fabulous!


Chef Gordon Ramsay's Roasted Pumpkin Soup (to serve with ham--need ham broth--see recipe below)

Ingredients
About 1.5kg cooking pumpkin .
Sea salt and freshly ground black pepper.
1 bulb garlic, cut in half horizontally.
Handful of rosemary sprigs.
1½ tbsp olive oil.
1 onion, peeled and chopped.
Pinch of freshly grated nutmeg .
30g grated parmesan cheese (or a small block of parmesan rind).
About 800ml hot ham stock or chicken stock.
100ml double cream.
15g butter.

To garnish

1½ tbsp olive oil, plus extra to drizzle.
400g wild mushrooms (e.g. trompette de la mort, pied de mouton and chanterelle), cleaned and trimmed.
Parmesan shavings.
...Method
1.Preheat oven to 190°C/gas mark 5. First, cut the pumpkin in half horizontally and remove the seeds (reserve the seeds as they can be cleaned and roasted later). Score the pumpkin flesh using a small sharp knife and season with salt and pepper. Rub the pumpkin flesh with the cut garlic halves, then lay the rosemary sprigs and garlic pieces in the centre of each half. Drizzle both pumpkin halves with a little olive oil.
.2.Put the pumpkin halves in large roasting trays and roast for 1-1½ hours, or until tender. (The exact cooking time will vary based on differences in oven temperature and the variety, shape, density and thickness of the pumpkin). The pumpkin is ready when you can effortlessly slip a knife into the thickest part of the flesh. Remove from the oven and allow to cool. Once cooled, remove the rosemary and garlic from the pumpkin and reserve the garlic. Scoop out the pumpkin flesh and set aside.
.3.Heat the olive oil in a large saucepan. Add the onion and stir frequently for 5-6 minutes until translucent but not browned. Scoop out 2-3 cloves of the reserved roasted garlic and add to the pan along with a touch of seasoning and pinch of grated nutmeg. Continue to sauté for a further 1-2 minutes. Add the pumpkin flesh to the pan along with the grated parmesan and stir together.
.4.Pour in the ham stock, bring to the boil then reduce the heat and simmer for 10-12 minutes. Stir in the double cream and heat for a further minute. In several batches, ladle the soup into a blender and blend until smooth. Add the butter and blitz again until you reach a rich, velvety smooth texture. Pour the soup into a clean pan to reheat.
.5.For the garnish, heat a tablespoon of oil in a frying pan until hot and then add the mushrooms. Fry over a high heat for a few minutes until the moisture released from the mushrooms has cooked off and the pan is quite dry. Season the mushrooms and remove the pan from the heat.
.6.Spoon the sautéed mushrooms into the middle of each serving bowl and top with parmesan shavings. Carefully pour the hot soup around the mushrooms and serve immediately.
....

Glazed Ham
Ingredients
3kg unsmoked boneless gammon joint.
4 medium carrots, peeled and roughly chopped .
1 leek, cleaned and roughly chopped .
1 onion, peeled and roughly chopped .
1 tsp black peppercorns, lightly crushed .
1 tsp coriander seeds, lightly crushed.
1 cinnamon stick, broken in half.
3 bay leaves.
Handful of cloves .

Honey glaze

100g demerara sugar .
50ml Madeira .
25ml sherry vinegar .
125g honey.
...Method
1.Put the gammon into a large saucepan and pour on enough cold water to cover. Add the carrots, leek, onion, peppercorns, coriander seeds, cinnamon stick and bay leaves. Bring to the boil, turn down to a simmer and cook for 3 hours, topping up with more boiling water if necessary. Skim off the froth and any impurities that rise to the surface from time to time. If cooking in advance, leave the ham to cool in the stock overnight. Otherwise, allow it to cool a little, then remove from the pan. Strain the stock (and save for soups, sauces, etc.).
.2.To make the glaze, put the sugar, Madeira, sherry vinegar and honey into a pan
.3.and stir over a low heat. Bring to the boil, lower the heat and simmer for 3–4 minutes, until you have a glossy dark syrup. Do not leave unattended, as it can easily boil over.
.4.Preheat the oven to 190°C/gas mark 5. Lift the ham onto a board. Snip and remove the string and then cut away the skin from the ham, leaving behind an even layer of fat. Lightly score the fat all over in a criss-cross, diamond pattern, taking care not to cut into the meat. Stud the centre of each diamond with a clove.
.5.Put the ham into a roasting tin and pour half of the glaze over the surface. Roast for 15 minutes.
.6.Pour on the rest of the glaze and return to the oven for another 25–35 minutes until the ham is golden brown, basting with the pan juices frequently. It also helps to turn the pan as you baste to ensure that the joint colours evenly.
.7.Remove from the oven and leave to rest for 15 minutes before carving.

Monday, November 10, 2014

Squash Season!!


Beautiful autumn squash is everywhere these days.  Are you cooking with it?  

One of the things I love about squash is how easy the prepping and cooking can be.  Of course, like any ingredient, you can make it complicated if you want to, but autumn squash taste great simply prepared.  

With squash, most of the effort is in the cutting.  Once you have that done, the oven does the rest.

Here are a few simple ways you can prepare squash ...and then, because we just couldn't stop ourselves, some more complicated ideas are below and in the next posting.  They're all delicious.


Delicata Squash

Slice thinly using a mandolin.  Toss the squash with olive oil and garlic salt.  Bake at 300 degrees until brown.  Serve like chips or over kale with balsamic drizzle.


Acorn Squash

Ingredients:
1 acorn squash
2 T grass-fed butter
sea salt and ground black pepper to taste
2 T coconut palm sugar or coconut nectar  

Cut a butternut squash in half and scrape out seeds and stringy pulp.  Put cut side down in a baking dish and add 1 cup of water.  Bake 40 minutes.  Check for tenderness.   To serve, while hot and just out of the oven, turn the squash inner side up.  Add the butter, salt and pepper and coconut sugar and let the ingredients melt in with each other.  1 squash serves 2 generously or 4 modestly. 


Kabocha Coconut Soup
1/2 Kabocha Squash
2 tablespoon chopped green onions
1 tablespoon chopped ginger
1 cup chicken broth
1 can coconut milk

Toss squash, green onions and ginger in a soup pot with 1 cup chicken broth and simmer until tender. Puree in food processor. Return to pan, add coconut milk and heat. 


Links to other squash recipes:


Low Gluten, Sugar-Free Pumpkin Pie


Spaghetti Squash with Shitaki

Friday, October 31, 2014

How about a delicious nutritious low gluten, no-sugar pumpkin pie. Trust us...you want this!


It's late October and pumpkins are everywhere. Seeing them all, my mother reminisced to me about her own grandmother’s delicious pumpkin pie.   My mom was part of a large midwestern family and pumpkin pie was their most favored dessert for Thanksgiving and Christmas dinners. 

It got me thinking...pumpkin is such a healthy food, couldn't we make pumpkin pie into something that is entirely healthy?  Well, we rolled up our sleeves and got to cookin' and we came up with a delicious pie that is healthy enough that just about anyone can eat it. In fact, we started with my great-grandmother's pumpkin pie recipe. But we've removed the gluten, the sugar and the milk and cream.  

What's left?  Only pure simple, all-American goodness.  This is not a weird, fringed-out, only for extremists and kooks "health food".

This is a pumpkin pie. It smells like a pumpkin pie. It looks like a pumpkin pie.  It tastes like a pumpkin pie.  After all, isn't this exactly what we all want?  Delicious healthy food that keeps our bodies operating at the highest level?

This pie uses einkorn flour, an ancient grain that has a low gluten content.  The sweeteners are a healthy, low-glycemic coconut nectar and stevia powder.  Of course, pumpkin is a very nutritious vegetable (see below) and using organic grass-fed butter ups the inflammation reducing omega-3 content.  Yippee--butter is good for you!

It's nice to know all that, but honestly, it really all comes down to taste factor, doesn't it. Is it tasty and pleasure-ful enough to make it worth the time and trouble to make?  You tell us...


Einkorn Pie Pumpkin Pie

This einkorn pie crust is flavorful, crunchy as opposed to flaky, and slightly nutty.  Very good and easy to handle.

For the crust (double crust):
4-1/2 c Einkorn flour*
2 t kosher salt
12 oz UNSALTED butter, chilled, cut in small pieces
½ c ice water
2 T vodka

Hand Method-- Whisk flour and salt. Rub or cut bits of butter into flour until it looks like sand.  Sprinkle vodka and water over.  Combine into a thick ball barely holding together, adding water as needed.  Shape into a flat circle and wrap in plastic wrap.  Chill 30 min.

Food Processor Method-- Put 2 1/2 cups of flour, salt and butter into the bowl of a food processor and pulse ten times.  Add remaining 2 cups of flour and pulse 5 times.  Add the liquid 1 T at a time, pulsing for 1 second between each tablespoon.  Combine into two balls barely holding together, adding water if needed.  Shape into a flat circles and wrap in plastic wrap.  Chill for 30 minutes.  

Roll dough into 10 in rounds ¼ inch thick and place in a 9 in. pie plate lined with parchment paper and weights.  Crimp edges.  Chill 20 min.  Bake in 300 degree oven for 15 minutes.  Remove parchment and weights.  Bake 10 minutes more until pie dough is just cooked but not browned.

Pumpkin Filling:  
1 c pumpkin (any canned organic variety will work)
3 T Coconut Crystals
1/3 c  coconut nectar
1/4 t ginger
½ t cinnamon
4 T melted butter
2 eggs
1 c unsweetened almond milk  (use a rich variety of almond milk, if possible, such as Califia or So Delicious 5x protein).  


Beat eggs well and add stevia, coconut nectar, spices, pumpkin and almond milk. Pour pumpkin mixture into the baked crust and bake at 350 degrees until done, about an hour.  Starting at 50 minutes, test for doneness by inserting a toothpick in the center of the pie.  The pie is done when the toothpick pulls out clean.

Whipped Cream Topping Options:  Some people with dairy sensitivities can tolerate goat milk (and goat milk is anti-inflammation).  Goat milk ice cream, especially the Laloo's brand, is absolutely delicious.  For more information on dairy intolerances and goat milk, go here.  
 

*Notes about baking with einkorn flour:  Einkorn is a delicious ancient wheat flour, first used by man 10,000 years ago.  It's gluten content is significantly lower than the flour you would normally buy at the supermarket.  It's protein content is much higher, too.  Einkorn flour is slightly different to work with.  In recipes, it uses 1/3 less liquid than normal wheat flour and einkorn doughs can be stickier.  If you add too much water, the dough will become too soft and sticky to stand up to rolling.  Also, in bread baking, einkorn requires significantly less kneading than regular wheat dough.  


Friday, October 24, 2014

Gettin' Your Greens On--Project 333 Day 3

So, how is it going so far?  You might be noticing some changes by today.  If you suffer from inflammation, and that inflammation shows up in your face and body tissues, the puffiness may be beginning to reside by today.*  Your head may be starting to clear and your thinking getting sharper.

Here are our menu suggestions for Gettin' Your Greens on Day 3.

Day 3 Breakfast--Super Green Smoothie (or Farro with Super Greens and Fried Egg)


Another Su;per Green Smoothie? Or...


We're recommending that you have a Super Green Smoothie again this morning because we believe in their powerful healing properties.  However, if you find that they're just not for you, try substituting our farro and fried egg breakfast.

Cooked farro is absolutely delicious and adding a fried egg makes this meal look more like a traditional breakfast.  Be sure to add those super greens on the side for super energy!

Bring 1 cup of farro* to a boil in 2 cups of organic chicken stock.  Reduce the heat to low, cover and simmer for 25 minutes.  Stir in 4 tablespoons of grass fed butter and salt and pepper to taste.  Top a serving of the farro with super greens sauteed in olive oil, salt and pepper.  Gently fry a grass fed egg in grass fed butter and place it over the super greens and farro.  If desired, pour a tablespoon of flax oil over the top for additional anti-inflammation healing.

*If you can't find farro, try amaranth grains or pearl barley.  They're all delicious prepared this way.

Day 3 Lunch--Spinach Wrap Sandwich

Here's an easy-to-pack lunch.  Using a large tortilla style wrap, make a sandwich with fresh kale, sliced red bell peppers, cucumbers, shredded carrots, hummus and tzatziki sauce or hummus and baba ghanoush.  (You can find both the hummus and tzatziki at Trader Joe's.)  To make lunch more filling, you could also pack 1/2 avocado with a little lemon juice, salt and pepper and your choice of fruit.  Or, if you love a treat, try our fabulous recipe for low gluten, no sugar Toll House chocolate chip cookies, here.

Roll 'er up, folks!  A hummus and kale wrap that is delicious, filling and healthy!
By the way, if you are on an anti-inflammation diet, you can use a gluten-free wrap. The wrap we used here is made primarily from teff, which is gluten-free.

Day 3 Dinner--Add an Arugula Salad

For tonight's dinner, how about adding an arugula salad to whatever protein and vegetable you have planned.  If it's summer time, we love arugula and watermelon sprinkled with pine nuts and a little feta cheese.  In the cooler months try arugula, pears, walnuts, dried cranberries and a little goat cheese.  To make a great vinaigrette, mix together 2 T olive oil, 1 T flax oil, 1 T lemon juice, 2 t apple cider vinegar, 1/2 t Dijon mustard, 1/4 t dried dill, 2 T finely chopped shallots, sea salt and fresh ground pepper to taste.

Pears with arugula and other super greens, cranberries, goat cheese and walnuts.

We're hoping by this point you're getting the hang of Gettin' Your Greens On.

It's easy to add greens into your daily life.  Just start each day with a Super Green Smoothie or add some sauteed greens to your eggs or cooked grains for breakfast.  For lunch, fortify your favorite sandwich with a big handful of fresh greens to add taste, flavor and healing punch.  For dinner, add several handfuls of greens to just about any soup recipe, serve a salad made with super greens, or saute greens and serve them as a side dish. Hey, you're getting this!

 It's all just a matter of getting in the habit of Gettin' Your Greens On!  


*If you're one of those people that tends toward puffiness, it really takes a week of this to see radical results.  In fact, if you want to ban puffiness altogether, make sure to avoid gluten, dairy and sugar while you're Gettin' Your Greens On.  You'll be amazed at what a week of avoiding these three inflammatants and adding super greens will do for your appearance.  Your skin will glow, your eyes will sparkle, your body tissues will de-puff and you will be leaner, stronger and more clear headed.

Thursday, October 16, 2014

Gettin' Your Greens On--Project 333 Day 2

So day 1 was easy and we're starting to see that it's not so difficult to add greens to every meal.  What's on the menu for day 2?

Day Two Breakfast--Omelette with Spinach

This couldn't be easier, just add a splash of water to a small omelette pan and add in several generous handfuls of spinach.  Saute until tender.  Dress the spinach with olive oil, salt and pepper and move to a serving plate.  Then melt a little butter in your pan and swish it all around, add in two eggs stirred up with a tablespoon of water and some sea salt and pepper and you have your omelette.  For a little fun, here's Julia Child with her omelette tutorial.


Omelette with sauteed greens.  Oh, if only I could nail the Julia child wrist flip!

Super Green Smoothie fans:  By the way, we're showing you the omelette for a little variety, but if you like the Super Green Smoothie, go ahead and have it every day. Keep it up for a few weeks and you'll be amazed at how much energy you have and how clear your head gets.  


Day Two Lunch  --Super Green Salad with Tuna Tarragon

Tuna is an excellent ingredient for anti-inflammation because it's high in omega-3 oil. Just mix up our tuna tarragon and serve it on a bed of super greens of your choice. You can drizzle a bit of vinaigrette over the greens if you wish.  (Combine 3 parts oil to 1 part vinegar or lemon juice.  Season with salt, pepper, dry mustard, dry dill and chopped shallots.)  If you use flax oil for some or all of the oil in your dressing, you'll be upping the inflammation fighting omega-3s even more.  

Tuna tarragon on a bed of super greens.  


Day Three Dinner--Add some greens to your favorite soup recipe.  

What's your favorite soup?  Chicken noodle?  Mexican chicken?  Italian meatball?  Whatever it is, toss a generous quantity of super greens into it.  If you want to try something new, how about this Indian tomato spinach version:


Indian Tomato Spinach Soup

Ingredients:
3 T olive oil
2 leeks chopped
2 bay leaves
1/2 t ground cardamon
1/4 t cinnamon
1 1/2 t salt
1/2 t ground pepper
2 t curry powder
3 cups organic chicken stock
2 cans organic stewed tomatoes
6 boneless organic chicken thighs cut into bite-size pieces
1/2 cup cooked basmati rice
1 can organic chick peas (also known as garbanzo beans)
4 cups spinach or other super green

Put olive oil and leeks into a soup pot and saute until leeks are softened.  Add all ingredients up to tomatoes and simmer for 20 minutes.  Add in chicken and continue simmering until chicken is just cooked.  Add in rice, chick peas and spinach and heat just until spinach leaves have softened.  Serve.


See our next posting for Day 3

Wednesday, October 15, 2014

Gettin' Your Greens On--Project 333, Three Days, Three Meals a Day

Let's face it, these days pretty much everyone is aware of the tremendous healing power of kale and the other super greens.  However, many people are unsure of just how to harness this power by adding enough greens into their everyday lives.  Sure, we've all had a kale salad somewhere, but how do we actually significantly add more super greens into our daily meals?

The project--eat more super greens during the next three days.  In fact eat them at every meal for the next three days.  Think of it as a mini-green-cleanse, if you will.  Can it be done?  Greens at every meal for three days?  Three meals, three days.  Of course it can, and we'll show you how.  But first...

Super greens are powerful inflammation fighters.  As you may know, inflammation in the body is a cause of most diseases.  Heart disease, diabetes, cancer, all the auto-immune diseases, arthritis, and many more illnesses are directly related to inflammation.

What are the super greens?  All the dark leafy greens are what we refer to as super greens.  Kale, chard, spinach, collard, beet, arugula, mizuna, quinoa and amaranth, among others, are some of the dark leafy greens that you may be able to purchase at your local supermarket or Farmer's Market.  

Okay, so that said, let's get started.

Day One Breakfast--Super Green Smoothie

At NutritionScienceRX, we're all doing it.  We love our morning Super Green Smoothie.  In fact, we're absolutely addicted to them, especially for the energy and brain power they give us.  Click for our recipe for the Super Green Smoothie.

Start with fresh organic fruits and vegetables.  And don't forget the super greens!!!  There are amaranth greens in this batch, hiding underneath the parsley.  Switch it up--add a different super green each time you fire up your processor or blender.

We look forward to this every morning!

Day One Lunch--Easiest way to get your super greens--Trader Joe's salads!  

Delicious, too.  Trader Joe's has a fabulous collection of affordable pre-made salads.  We keep our refrigerators stocked with them.  Look for salads that have super greens like this Broccoli Slaw and Kale Salad with Chicken.  By the way, this is a favorite of just about everyone who's tried it.

This salad is one of Trader Joe's most popular products, according to my checker last week!

Day One Dinner-- Pea and Greens Salad 

I brought this dish to a church potluck.  It's similar to a salad Nigella prepared on one of her shows.  Just about every ingredient in it is anti-inflammation.  The recipe below makes half the quantity shown in the photo.  Serve it as a side dish for dinner.  In fact, why not make dinner easy, toss an organic chicken in the oven to roast along with some sweet potatoes.  Nothing could be more simple than roasting a chicken.  I just prop the chicken up on a vertical roasting stand (see bottom of posting) and cook until the skin is golden and the juices run clear near the leg joint when poked with a fork.  By the way, organic grass-fed butter is an excellent inflammation fighter.  So go ahead and enjoy those sweet potatoes with butter, salt and pepper.  There you have it.  An easy, PEAsy dinner!  


Pea and Greens Salad

1 16 oz package of frozen peas
2 T olive oil
1 T flax oil (very anti-inflammatory)
1 T lemon juice
1 T apple cider vinegar
1 t mint dried
1 t Dijon mustard
1/2 t sea salt
1/2 t ground pepper
1 1/2 T finely chopped shallots
butter or bibb lettuce
spinach leaves
avocado
fresh mint

Whisk together the olive oil, lemon juice, vinegar, dried mint, Dijon, salt, pepper and shallots.  Prepare the frozen peas by boiling them for a few minutes in a few inches of water, being careful not to overcook.  Drain them and run cold water over them to keep them from continuing to cook.  Shake the colander to remove as much water as possible.  Pour the vinaigrette over the peas and taste.  If it needs more punch, add additional salt and another t of apple cider vinegar.  Spread the greens on a platter and toss in the peas turning all the peas and leaves together so that the dressing is spread throughout.  Top with avocado and fresh chopped mint leaves.  Nigella used toasted pine nuts, as did I, but I actually think the recipe would be better without them, so I left them out here.  

See tomorrow's posting for Day 2!


Monday, October 6, 2014

Just like Julia

For the second time now, I am reading "My Life in France" Julia Child's autobiography. This book is an easy read and a joy to spend time with.  Julia Child lived life with passion and pleasure and this is apparent in her autobiography.  "My Life in France" is so good that when I read it the first time, about eight years ago, my husband saw how much I loved it, read it too, and was utterly charmed by it. Believe me, women's autobiographies are really not his thing!

Anyway, as part of the fun,  I have been watching Julia's videos on youtube from her old TV show, "The French Chef" and cooking along with her.  Saturday I watched her make a Nicoise salad and Sunday night, that was our dinner.  Of course, much of Julia's cooking is complicated and time consuming, (like the croissants I'm going to tackle today).  Her two volume masterpiece, "The Art of French Cooking", contains all kinds of difficult recipes requiring unusual ingredients, techniques and cooking equipment, at least by the usual American standard.  Even back in the day when I was just beginning to cook and taking cooking lessons from some of Los Angeles' best chefs, I found many of the recipes in her cookbook intimidating.

Nicoise salad is easy in comparison and in, fact, I've made one many times before.


However, this one is different, simply because it's Julia's.  I made it her way, except for the anchovies which I left out.  Julia uses anchovies preserved in salt which she purchases in Nice during the show.  These were a bit hard to obtain in Tahoe City...and I don't really like anchovies much anyway, so they were out.  Otherwise the recipe is pretty much the same.

I am often complimented on my salad dressings and when people ask me why they taste so good, I give the credit to the addition of fresh or freeze-dried shallots, which I feel really add a little tang and excitement to any vinaigrette.    I'll sometimes smash up a garlic clove and let it sit in the dressing for awhile but I remove it before serving.  In Julia's dressing, however, it's all about the garlic.

Vinagrette for Nicoise:

1 garlic clove mashed
1/4 t salt
1 1/2 t lemon juice
1 t wine vinegar
1/2 t dried mustard
fresh ground black pepper
1 t lemon juice
1 t wine vinegar
1/2 cup olive oil

Julia starts with the smashed garlic clove in a mortar and pestle.  She then adds in the salt, 11/2 t lemon juice and 1 t wine vinegar and makes a loose paste.  This is then put in a measuring cup to which she adds the dry mustard, pepper, and remaining lemon juice and wine vinegar.  Briskly whisking, the olive oil is slowly dribbled in until she has a good emulsion.

Potato Ingredients:

5 medium round potatoes like Yukon Gold boiled until perfectly done and sliceable, still hot
1 T fine chopped shallots
salt and pepper to taste
2-3 T white wine
water from boiling pan


Slice the potatoes and put them into a bowl while they are still very warm.  Take 1 T of cooking liquid and splash over potatoes.   Add the shallots, generous salt and fresh ground pepper to taste, and white wine.  Let sit until assembly.

Remaining ingredients:

green beans, boiled to al dente
2 summer farmer's market quality tomatoes
Nicoise olives
capers
2-4 fresh boiled eggs
1 can of tuna
1 head of leafy green lettuce such as Boston lettuce, washed and crisping in refrigerator

On a large platter:  Use some of the vinaigrette to dress the lettuce and arrange it in a ring around the exterior of the platter.  Add some vinaigrette to the potatoes and place them in the center of the lettuce.  Quarter the tomatoes and place them in groupings on the lettuce.  Place clumps of olives and capers between tomatoes.  Add the tuna on top of the potatoes, being sure to let some potatoes show.  Place the halved eggs around the tuna.  Add remaining vinaigrette to the green beans, divide them into four clumps and arrange around the platter as shown in photo.

Be sure to wear your pearls and an apron while you're cooking, if you truly want to channel you're inner Julia.

Here's Julia's video if you'd like to watch her in action.  Either way, you must at least watch the first minute or two.  Her unmistakable voice and style is simply, tooooooooo delightful!


Wednesday, October 1, 2014

Fall is in the Air and Squash is at the Markets!

I'm always a little sad to see summer end.  But then I start to think about all the great fall experiences, like watching the leaves change color and blow about in the wind, pulling out cozy sweaters for the first cool weather, and warm, hearty fall cooking.

I love the autumn squashes which are starting to turn up at our local markets about now.  These are harvested in fall, but store very well in a cool place, so you'll see them for sale throughout winter and early spring.

One of my favorite squashes is the spaghetti squash.  It has a delicious sweet flavor and I love to use it as if it were pasta, with fabulous rich toppings that take it from ordinary veggie to sublime experience.

When selecting a spaghetti squash, look for one without spots on the exterior and select the one that seems the heaviest for its size.  There's a little trick to cooking it properly and it all has to do with the timing.  If you over-cook spaghetti squash, you get mush.  If you want the spaghetti-like strands, you need to cook it for the right length of time and no more.  It's easy once you get the hang of it.

For a quick to prepare but knock-your-socks off dish, try the recipe below for Spaghetti Squash with Shiitake Mushrooms.


Fresh shiitake mushrooms from my local Farmer's Market.
As always in a simple recipe, it's all about the quality of the ingredients.  Buy the best you can afford.  I used a beautiful fresh box of shiitake mushrooms from the mushroom grower at my local Farmer's Market.  Also, I used organic grass fed butter.  Grass fed butter is an excellent source of omega-3s that help fight inflammation within the body.  You can eat it guilt-free.  It also tastes fabulous.

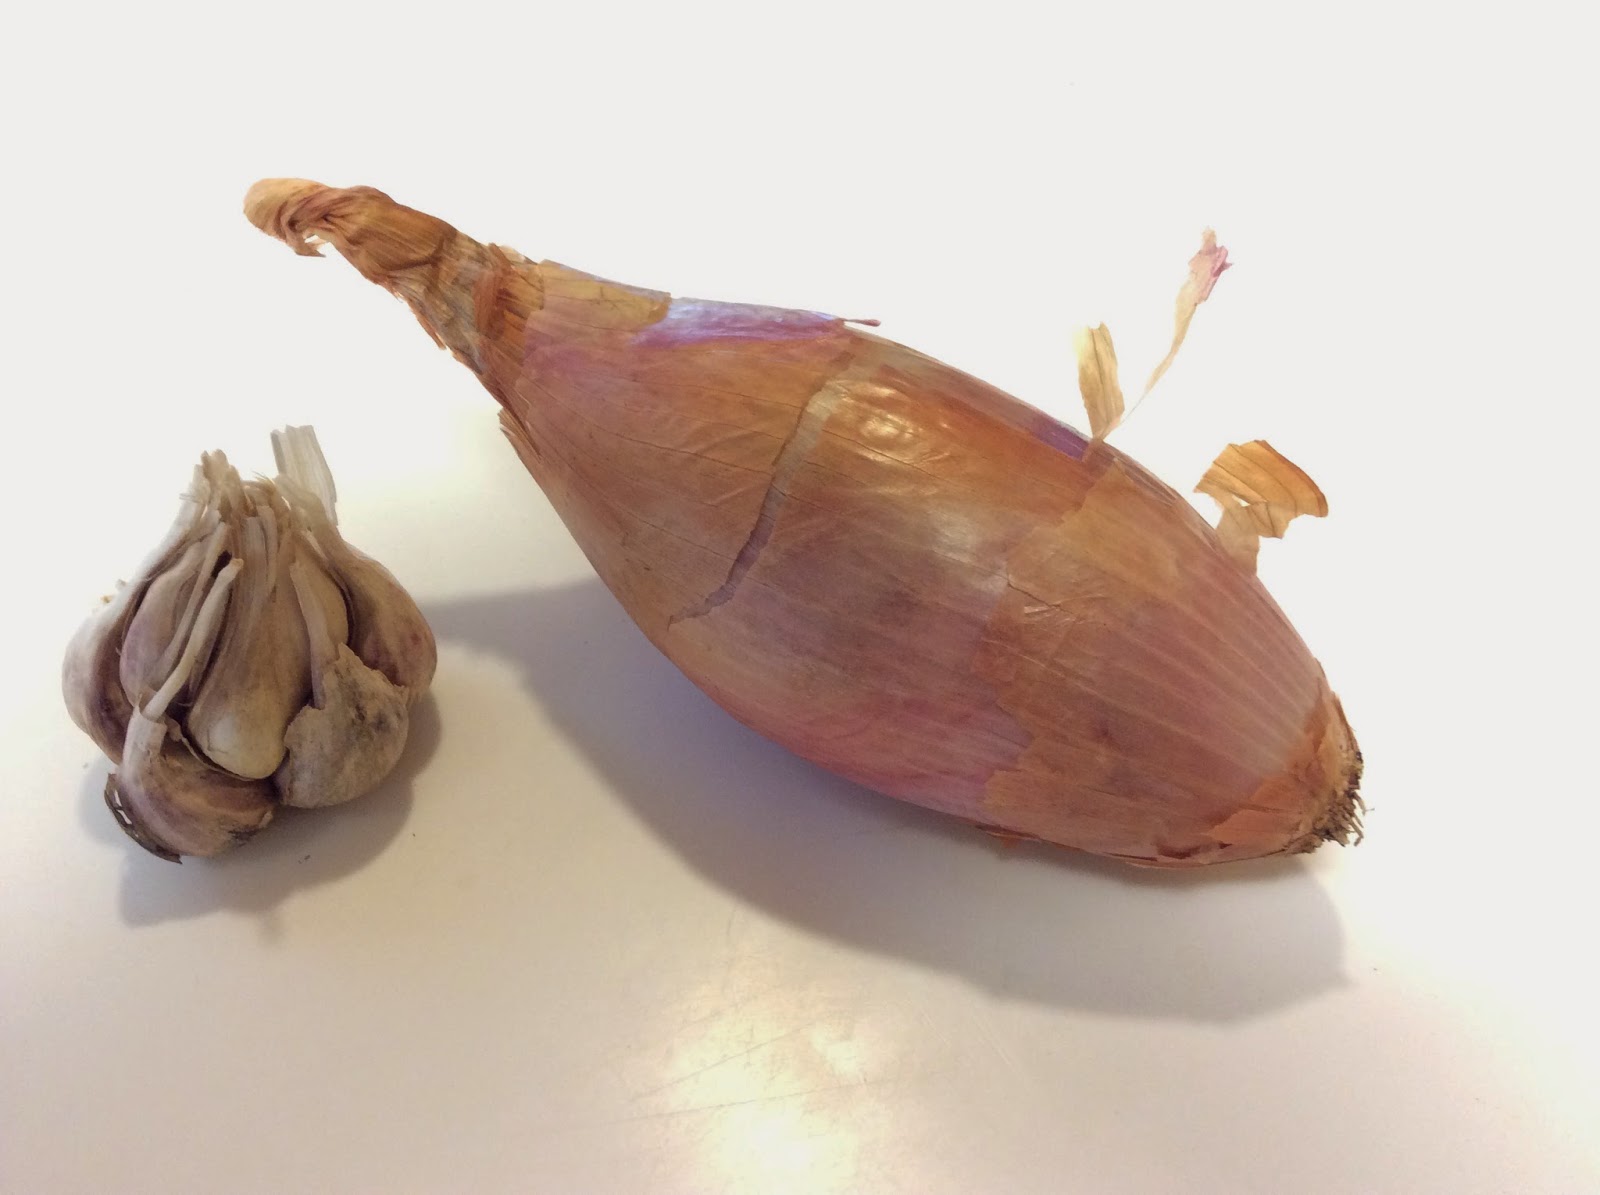
I used this torpedo onion from my local farmer's market.  


I also had a gorgeous torpedo onion from my Farmer's Market, but you can easily substitute fresh shallots.  The taste is very similar.


Spaghetti Squash with Shiitake Mushrooms

1 spaghetti squash
1/4 cup torpedo onion or shallots finely chopped.
1 garlic clove minced
1 large box of shiitake mushrooms sliced
3 T organic grass-fed butter
3 T olive oil
fresh thyme or 1/2 t dried thyme
pink Himalayan sea salt or other sea salt fresh ground
freshly ground black pepper

Cut the squash in half and place the two halves inside down on a baking sheet.  Roast the spaghetti squash at 400 degrees for 50 minutes.  Check for doneness.  The flesh should spoon away from the sides of the walls in spaghetti-like strands.

In a sauce pan over medium high heat, add the olive oil and saute the onion or shallots until slightly translucent, stirring and watching closely.  Add the shiitake mushrooms and garlic and keep cooking until mushrooms are softened and tender.  Add in the butter, thyme, and salt and pepper to taste and cook until the moment that the butter has just melted.  Remove from heat immediately.  To create a serving for one, spoon  a cup of hot roasted spaghetti squash into a bowl or plate and top with a generous portion of mushroom mixture.  Make sure that there is plenty of butter and oil to soak down into the squash just as you would with pasta.


Tuesday, September 16, 2014

Turmeric, Ginger and Kale for a Superfood Soup

Okay...I confess.  I'm a food snob.  I don't put any food in my mouth that doesn't taste delicious.  I simply don't...I won't waste my time and calories on it.

Food should taste fabulous and bring us pleasure.  It only takes a little bit more effort in the kitchen to eat food that bursts forth with flavor. I want joy from my food and I'm willing to do what it takes to get there.

However, food is more than just a wonderful eating experience.  It should also keep our bodies healthy, self renewing and supplied with plenty of natural energy.  And I want one other thing from my food...brain power--none of that basketball head blurry mind feeling for me.  I want top-level thinking performance.

Yes, it's a tall order, but there are plenty of foods out there that easily fit the bill.

Lately, I've been interested in some of the inflammation fighters, specifically turmeric, ginger and kale.  I've never really focused on turmeric before.  Somehow I had the impression it was more of a coloring agent than flavoring agent.  Although I have added it to recipes when called for, I never really noticed much about it.  Boy, was I missing out!  Turmeric has a lovely warm, peppery and earthy flavor that I am starting to crave.

I've been cooking with turmeric for several weeks now and I am absolutely in love with it.  In fact, I woke up this morning obsessing so much about it, that I made a turmeric, ginger and kale soup.  Turmeric soup for breakfast?  Okay, I admit it's a little crazy, but well, why not?  It tastes much better than any old bowl of porridge.  That's what I think!

By the way, fresh turmeric root is available in fall and winter months so start checking your farmer's market now. You might also be able to find it at a local Asian market.

When you cook with turmeric, keep in mind that turmeric absorption in the stomach is aided by the inclusion of freshly ground black pepper, so be generous with the pepper grinder.

Turmeric, ginger and kale.  All three of these ingredients are inflammation fighting power-houses.  Inflammation, as you may know, is a leading cause of many diseases including many cancers, heart disease, arthritis, Alzheimer's, all the auto-immune diseases and diabetes, plus many, many more.

I'll take my medicine in the form of yummy superfood soup, thank you very much!


Turmeric, Ginger, Kale and Garbanzo Bean Superfood Soup

Toss the following ingredients into a large soup pot:
3 T olive oil
2 small onions chopped into small pieces
1 garlic clove finely chopped
1 1/2 T fresh turmeric chopped very fine or grated (or 3/4 t dried turmeric)
1 1/2 T fresh ginger chopped very fine or grated

Saute until softened.  Then add:
32 oz organic chicken stock
1 can garbanzo beans rinsed thoroughly
2 large chopped tomatoes
6 lightly packed cups of raw kale
generous fresh ground black pepper and sea salt

Optional:  Add either 1/2 cup organic cream, 1/2 cup goat yogurt or 4 T cashew butter

Let soup simmer until flavors soften and combine, about one hour.  Option:  If you eat dairy products, you can add the cream to thicken and enrich the soup.  If you are on an anti-inflammation diet, try the goat yogurt,  And if you never eat dairy, you can add cashew butter, if desired.


Tuesday, September 2, 2014

"I Can't Go There Yet"

This week at my farmer's market there were pumpkins.  Yes, pumpkins!


I showed up early in the morning and I actually bought an adorable little pumpkin thinking I might like to make some pumpkin risotto.


My little pumpkin!


 However, while I was paying for it, a woman walked up and said, "Oh no, pumpkins!  I can't go there yet."

I had to laugh to myself.  She was right.  It's way too early for pumpkins. I'm not ready to let go of summer yet.  I'm still loving my flip flops, my bathing suits and my late afternoon walks down at the dog beach.  It is too early for fall, right?

As I walked away from the pumpkin booth I heard another woman come up and say, "Oh no, pumpkins!"  

Later on in the day I was back at my market for my weekly volunteer job picking up the extra produce from the farmers to deliver to Project Mana, our local food bank.  When I went back to the pumpkin farmer, the pumpkins were all still there, the box nearly full.  "How did it go with the pumpkins?"  He looked at me and laughed, "You and another woman were the only ones to buy a pumpkin all day."  And what did he hear over and over all day long?  "Oh no, pumpkins! " 

Wednesday, August 27, 2014

5-Minute Farmers Market Summer Cucumbers


I'm loving cucumbers right now.  We've had them every other night for the last few weeks.  And ... I have a confession to make.  I serve them the exact same way each time.  It's fast, it's easy, it's delicious.  Why mess with perfection?

Here's what I do:

 5-minute Summer Cucumbers


2 small summer cucumbers from the garden or farmer's market
olive oil
champagne vinegar
pink himalayan sea salt
fresh ground pepper
dill (fresh is best but dried works just fine)

Just slice up the cucumbers and put them on a pretty plate.  Drizzle with good olive oil and champagne vinegar.  Sprinkle generously with sea salt, pepper and dill.

Fresh, delicious. fast and easy!

Saturday, August 23, 2014

Thinking Italian with the late summer harvest: eggplant...tomatoes...basil


I picked up a couple of eggplants from the farmer's market yesterday along with the usual armload of summer tomatoes and basil.  There's a reason the Italians combine these flavors together.  Not only do they taste wonderful with each other, but they all come to harvest at the same time, making them a summer farmer's market natural.


I also picked up this gorgeous torpedo onion and some locally grown garlic.


Here are the two small eggplants I chose.


Of course, I tossed it all in a pan and cooked it up.  The results...a delicious summer evening side dish.


Summer Eggplant Saute'


Ingredients:

2 T olive oil
1 torpedo onion or regular sweet onion chopped
2 small eggplants peeled and chopped into 1/4-1/2" pieces
1 garlic clove
1 t Himalayan pink salt crystals
1/2 t dried oregano
1/2 t dried thyme
1/4 t Valle del Sol chilli powder
4 tomatoes choppped
2 T butter
2 T fresh chopped basil

Put the olive oil in a large frying pan and add the onion.  Saute' at medium heat until the onion starts to turn translucent.  Add the remaining ingredients and continue to saute' until all vegetables are soft.  If needed add an extra tablespoon or so of water to the pan.  

Tuesday, August 12, 2014

Peppers from the Farmer's Market

Jimmy Nardellos at the local Farmer's Market


This past month we've been really enjoying the skinny mild red peppers called Jimmy Nardellos that have been showing up at our local farmer's market.

Slim, Red and Mild

They are perfect for the summer BBQ season.  We just coat them in a little olive oil, sea salt and ground black pepper ... and onto the grill they go!

Long, slender and succulent.  Just off the BBQ!


And More Peppers... 

Shishito Peppers


This week we picked up some Shishito peppers from this lovely new farmer at the Tahoe City market:

New to Our Local Market


Her display was very charming and included a take-home recipe.


This is the recipe she provided:

Shishito Peppers with Miso vinagrette

1 pound shishito peppers
sea salt
1 T rice vinegar
1 T miso paste
1 t sesame seeds
3 T cooking oil (canola)

Grill the shishito peppers on a BBQ grill on medium heat until softened with just a few grill marks.  You don't want to blacken them.  Alternatively, you can toss them in a bit of oil and roast them in 400 degree oven for 15 minutes.  Sprinkle with sea salt after roasting.  

In a bowl, whisk together the remaining ingredients.  Taste and adjust seasoning.  Drizzle over the grilled or roasted shishito peppers.  Eat whole--stem, seeds and all!!


Shishitos and Jimmy Nardello's on the Grill


Although the recipe looked great, I didn't have miso paste on hand so we simply tossed ours on the BBQ with some Jimmy Nardellos.  Again, these were delicious in simple olive oil, sea salt and pepper.


And you know what...we did eat them whole.  Stems, seeds and all!